Overview
This article provides techniques and technical information for the use of ground ladders at emergency scenes. It is designed to be used as part of a hands-on class over the use of ground ladders.
The Click Method
Some situations may require a ladder to be extended without being able to actually visualize the ladder as it is raised. These type of situations can be caused by a falling debris, heavy smoke/fog, or simply because of a lack of available light. In these situations, a simple process called the “click method” can be used to get an accurate estimate of how high a ladder has been extended. This method relies on the “click” that is made when the locks slide over the rungs when the ladder is raised. When raising single fly extension ladders, one click is equivalent to one foot of vertical height. On two fly ladders, two clicks are equivalent to one foot of vertical height. Remember ladders with two fly sections have a set of locks for each fly. This results in the need to listen for the double clicks as the ladder is extended.
Example
A 24 ft. single fly extension ladder has a bedded length of about 14 ft. A firefighter needs to raise the ladder to a height of 19 feet. The firefighter would extend the ladder five clicks and know the ladder was extended 19 ft.
14ft. bedded length + 5 “clicks” (1 click = 1 foot) = 19 ft.
A 35 ft. two fly extension ladder has a bedded length of 15ft. A firefighter needs to reach a height of approximately 27 ft. the firefighter would need to listen for 12 double clicks to have the ladder extended to approximately 27 ft.
15ft. bedded length + 12 double clicks (1 double click = 1 foot) = 27 ft.
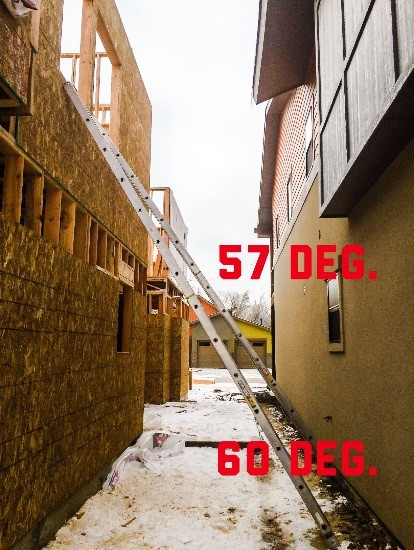
Ladder Angles

We typically set our ground ladders at one of two angles. The first is the traditional climbing angle of 75 degrees. The second, often more functional angle, is the rescue angle of 60 degrees. As new firefighters, we are all taught that the proper working angle for a ground ladder is 75 degrees. This is the angle that allows the ladder to be climbed and carry the rated weight capacity. The traditional 75-degree angle is used most often when we are climbing onto a roof of when we need to use the full working length of the ladder. When we ladder a window for entry and egress, the shallower 60-degree angle is more functional. It is also a safer angle for victim removal and in the event of an emergency requiring a firefighter to bail out of a window. To accomplish the 60-degree angle, the butt of the ladder must be five feet away from the base of the building for every story in height. For every five feet, the butt is away from the building, one foot of vertical reach is lost.
60 Degree Angle Distances for Butt Placement
2 story = 10 feet out from the building (2 ft. lost in reach)
3 story = 15 feet away from the building (3 ft. lost in reach)
4 story = 20 feet away from the building (4 ft. lost in reach)
Approximate Bedded Lengths of Common Ground Ladders
Ladder Type Bedded Length
14 ft. roof ladder 14 feet
16 ft. roof ladder 16 feet
24 ft. single fly extension 14 feet
28 ft. single fly extension 16 feet
35 ft. two fly extension 15 feet
Approximate Sill Height of Residential Windows
Story Height of Sill
1 story 3 feet
2 stories 13 feet
3 stories 23 feet
4 stories 33 feet
Ladder Placement
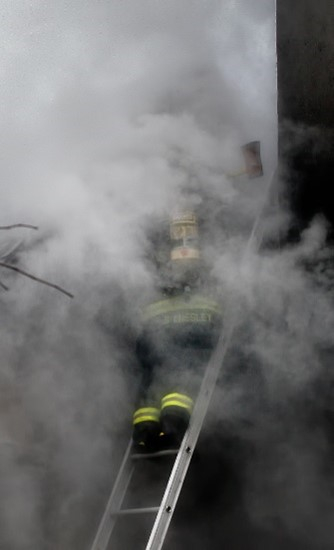
When possible, we want to place our ladders on the upwind side of our working area. This will aid in visibility and protect us from exposure to the products of combustion. When we do place our ladder, it is important to look at the surface we are operating on at the scene. Hopefully, we will be working on a softer surface such as a yard or asphalt that will allow the spurs of the ladder to dig into the ground. If we are forced to throw a ladder on a concrete or other smooth, solid surface, footing the ladder will be a high priority for safety. One only needs to do an internet search for “firefighter ladder failures” and there are several examples where a firefighter climbed a ladder that was not footed on a flat surface. The results can be very painful or worse.

https://www.youtube.com/watch?v=2nt0DT0nXq8
The footing can be accomplished by a second firefighter or by securing the butt of the ladder with a long length of webbing or rope to prevent it from kicking out. The tips of the ladder will be placed at different heights depending on the purpose for the ladder. If we are using the ladder for entry and egress from a window or for bringing a victim down, the tips of the ladder should be level with or slightly below the sill. This position limits the chances of a firefighter getting their PPE or SCBA caught on the ladder. This position also makes placing a victim onto a ladder easier. In high heat conditions, having the tip low to the sill will limit how high up into a window a firefighter needs to rise in order to get out onto the ladder. When we are placing a ladder to a roof, it is important to have plenty of ladder above the roof line. This added height aids in transitioning onto and off of the roof from the ladder. Having more of the ladder above the roof line also aids in locating the ladder when you are in a hurry or under low visibility. Some companies go so far as using reflective paint or tape on the tips of their ladders to make them more visible. The goal is to aim for five rungs above the roof line.
